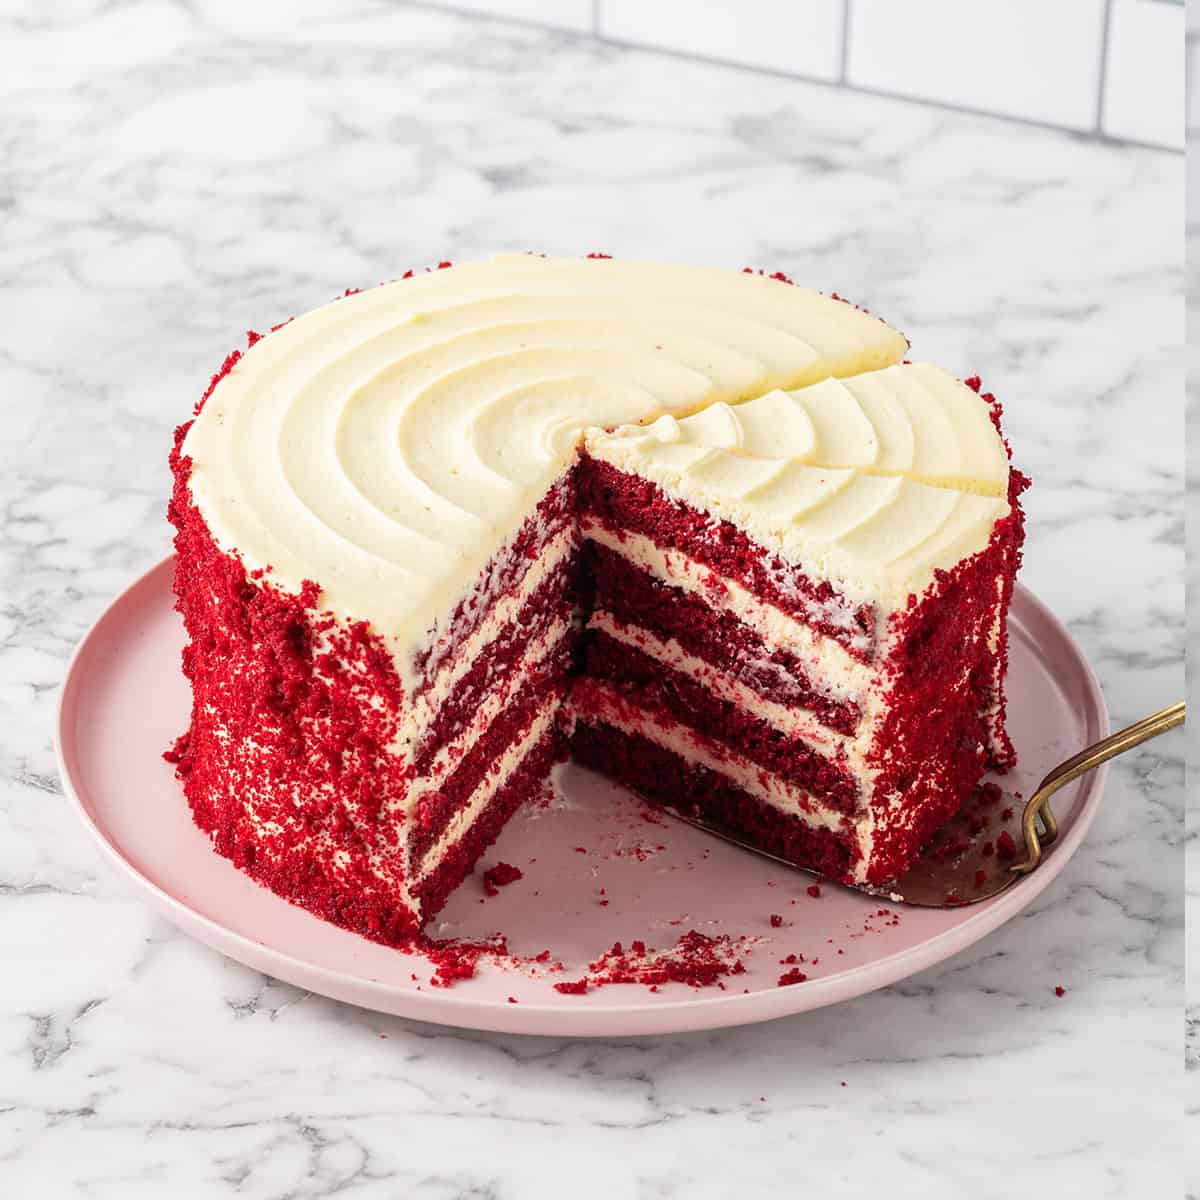
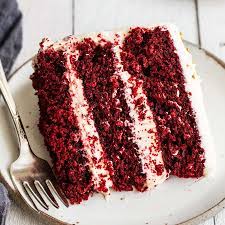
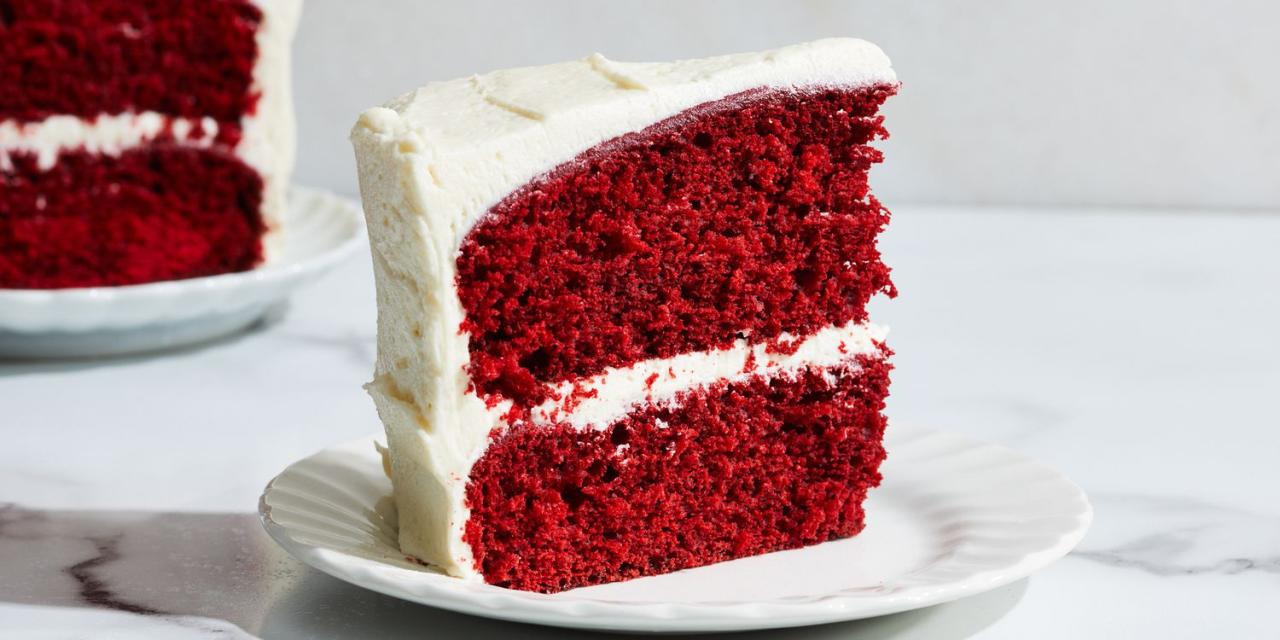
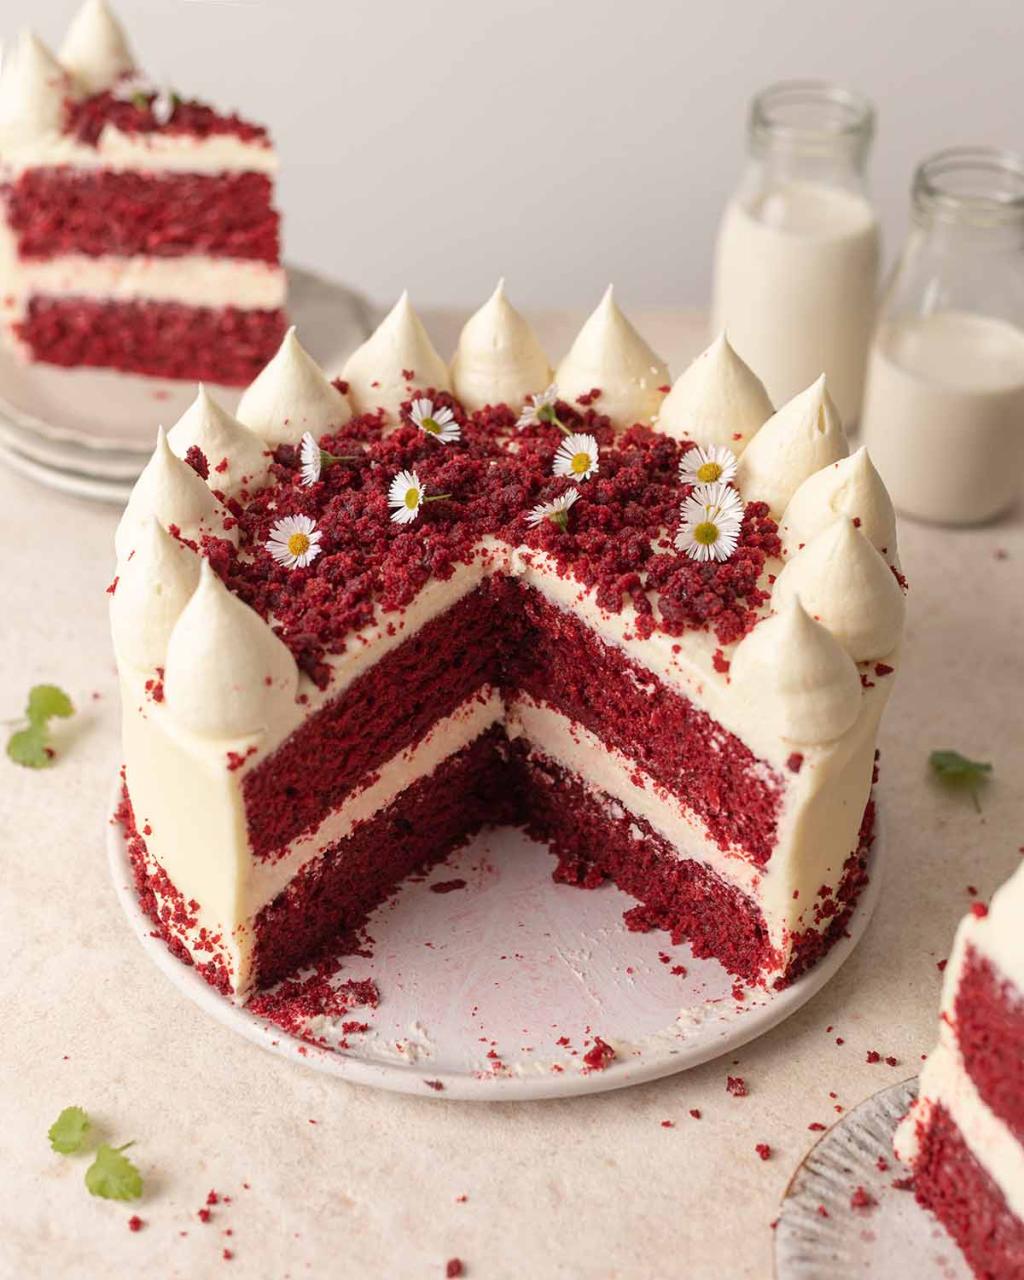
Red velvet cake — a name that conjures visions of rich, velvety smoothness, paired with a dramatic, passionate hue that’s as bold as it is inviting. It is a dessert that marvelously marries a delicate cocoa flavor with a slight buttermilk tang, all encased within layers of a soft, tender crumb. The sight of its trademark scarlet slices, often contrasted by the pristine white of cream cheese frosting, never fails to excite the senses and promise a gastronomic celebration.
Why choose to make this splendid confection, you may ask? For me, the allure of red velvet lies not just in its taste, but in the emotions it stirs. This cake is evocative of cherished memories and festive occasions. It’s a compassionate companion to a heartfelt Valentine’s dinner, a festive centrepiece for a Christmas gathering, or the crown jewel of a joyous birthday party. But beyond these special events, it embodies a moment of self-indulgence, a pause in the day to bask in a personal reward.
Deciding to whisk together this iconic dessert can feel like an act of love — whether it’s to celebrate the affection for another or to kindle a little warmth for oneself on a grey, uneventful afternoon. The process of creation is as comforting as the resulting cake is indulgent; there’s something almost meditative in the sift of flour, the creaming of sugar with butter, and the magical chemistry that unfolds in the oven as batter transforms into cake.
Red velvet cake Box of chocolate recipe
Red velvet cake
Equipment
- 1 oven
Ingredients
- 2 1/2 tsp flour 310 g
- 1 1/2 tsp sugar 300 g
- 1 tsp kefir 240 ml
- 115 g butter
- 200 ml of oil
- 2 pcs. eggs
- 2 tsp cocoa
- 1 tsp baking powder
- 1/2 tsp soda
- 1 tsp vinegar pinch of salt
- 2 pcs. vanilla
- 1-2 tbsp. red food coloring
- For Cream
- 200 ml of fresh milk
- 1 pack cream
- Ole chocolate without cooking
- 100 ml confectionery cream
- 200 g sour cream
- 100 g dark liquid chocolate
Video
How to prepare red velvet cake
So, this time I decided to try a new recipe, which is not much different from the previous one, but why not. And that’s why I wanted to make the velvet in a chocolate version, because there has to be such a red velvet cake – don’t you think? We start by sifting the flour into a bowl and adding the salt, vanilla, baking powder and soda. We stir. In another bowl, mix the cocoa separately, with the paint (I used gel and powder) and kefir, until we get a saturated red mixture. Be careful with cocoa, if it is very strong, add gradually so that you can get the color, as usually gel paints are easier to use when slightly warmed.
As you always ask me, this is the paint I used this time, keeping in mind that I put more – at least 1-2 tbsp. paint to achieve this color, as well as dry (it is from Kaufland). The latter may be superfluous, but better more than less 🙂 In the bowl of the mixer, beat the butter with the sugar, which is also good to be at room temperature. We start adding the eggs one by one until they integrate well. Then add the oil and flour mixture, as well as some of the red paint. Here are my observations: The more the paint is beaten, the brighter it becomes, so it’s good to add the paint at the end, stirring by hand so that your mixture stays deep red.
How long to cook red velvet cake box of chocolate
Distribute it in trays, and this mixture will be enough for two loaves of 22-24 cm, or for me it was enough for three heart-shaped loaves, and in its widest part it was 22 cm. Bake the loaves for about 35 minutes at 175 degrees, to a dry stick Thicker cut in half. My shape was silicone, but I still put baking paper on the bottom, which I greased with oil to make it easier to remove. At this stage I was thinking of letting the marshmallows cool down and continue tomorrow, but I was so euphoric about this color that I decided to continue with the cream.
I admit, I made it by eye, so I give approximate weights. I hadn’t thought about what kind of cream I wanted to make, but I knew I wanted it to be both very chocolatey and fresh, and that was born. First I whipped a chocolate cream Ole with fresh milk as described on the package. Then I started to gradually add the dark liquid chocolate (sent to me by my favorite friend Martha) and sour cream while I was whipping the cream and I added some liquid whipping cream so that the cream was neither too thick nor too thin, to be both sweet and fresh. I tried it and the moment I liked it, I stopped!
Here is what happened with the listed products! And although the marshmallows were perfect – I decided that this chocolate should be enhanced with the smell of coffee. I put too long coffee on the machine (decaffeinated), just for flavor, and syncopated the marshes – keep in mind that this can also help you enhance the color of the marshes by making them a little darker. The assembly is as follows – blat, coffee, cream, blat coffee, cream, etc. to the end.
I smeared only with cream on the side, because I had other plans for the top, and I wanted the red velvet to be slightly served as an elegant pad on the box. I finally put the cake to sleep in the fridge, and in the morning I continued with the tactile part. To make the cake as a box, we need higher chocolate walls that look like cardboard. Here’s how I improvised – you can do something better 🙂 To do this, I melted the dark chocolate in a water bath, and cut strips the height of the cake and one or two inches up.
Since I didn’t have acetate paper, I used the hard part of a plastic folder. I couldn’t get around the form with just two ribbons, so I did two and a half, but I had a plan. I am sure that if you make the cake in a rectangular, square or round shape it will be easier.
I spread a lot of chocolate strips and let them cool slightly so that the chocolate starts to set. After that, I walked around the cake with them, dropping the two long strips on the sides, and the short piece filled only the bottom of the heart. I had decided to decorate it anyway, it would not be visible. I pre-ordered the candies I wanted to use for decoration to see where and how I should spray ganache. I painted the chocolate walls with a little gold paint. To cover the joints, and to give the cake more details, I sprayed chocolate figures on the sides of it, as well as inside, making boxes for each candy separately. For this purpose, almost the whole ganache made of 300 ml of liquid cream and 250 g of dark chocolate went.